Maiden Flight of the Super Cub
I anxiously unboxed my long-awaited model airplane today: The HobbyZone Super Cub. I decided to document the assembly process and first flights with lots of photos. Read on for the log.
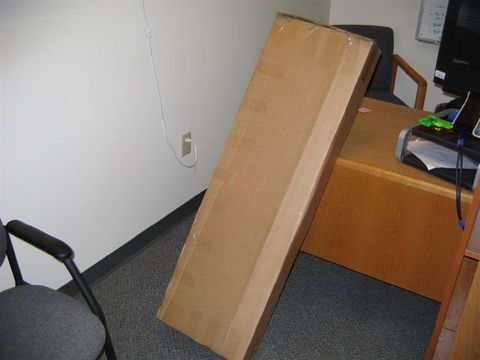
The package arrived in a brown box about 5 feet long. Here’s what it looked like coming off the FedEx truck:
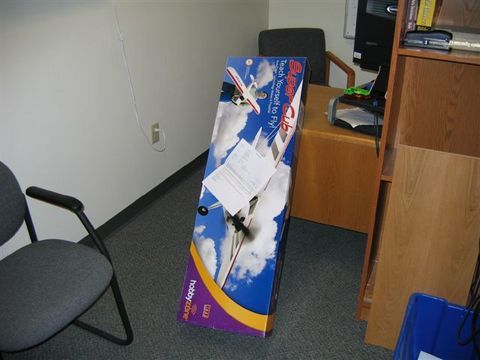
The plain brown was just a protective covering, housing a more “marketing approved” box from HobbyZone:
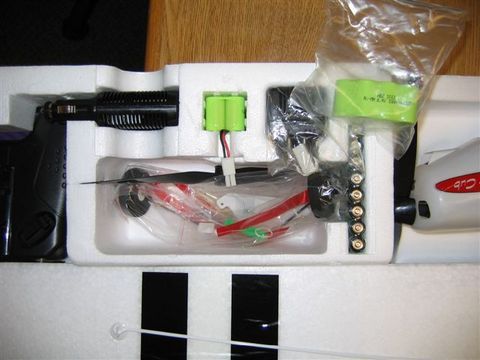
Unpacking this box revealed the following goodies:
Â

And for a close-up of all the little stuff:
Now came the fun part: Assembly. This airplane is just about ready to fly out of the box. All you have to do is put the landing gear on, attach the wings, attach the tail section, and charge the battery. HobbyZone even includes a screw-driver that theoretically fits all the screws, though I found it insufficient to handle the screws that hold the wing struts to the bottom of the battery box. This is as far as I could get with that wimpy little screw-driver:
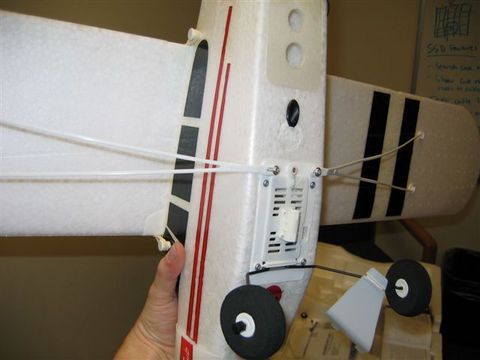
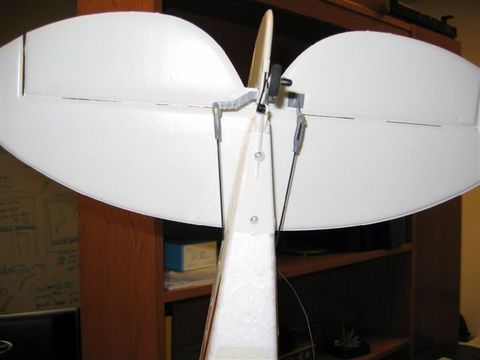
Notice how the screws are sticking out by about 0.25 inches. I just couldn’t make it happen with that little green screw-driver. Oh well. Onward we go. The wings attach via the struts I just talked about and 4 rubber bands that go criss-cross and straight over the top of the wing to attach to two plastic posts that stick out of the fuselage right above the cock-pit windows.
The landing gear attach into a slot in the battery box. You have to squeeze the wheels together and slide them in left, then right to get them to go in the slot. After that the wheel skirts attach with 2 screws each. These screws went in much more easily than the wing strut screws.
Then came the tail section. The tail came in two pieces: the vertical stabilizer (elevator) and horizontal stabilizer (rudder). The two pieces attached to eachother with no tools, and then slide onto the rear section of the fuselage. The process is guided by two posts that stick down from the rudder into the fuselage. On the bottom of the fuselage, I screwed two screws upward into the tail, like this:
Now the plane was all assembled. Behold, the Super Cub:
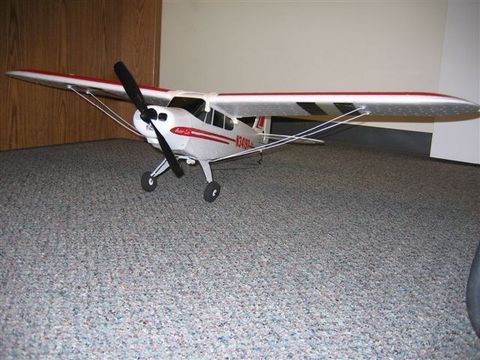
Looks pretty good. I decided to take it out in the parking lot behind my office to taxi it around on the concrete a bit. This proved pretty fun, but I nearly destroyed it a couple times. I got airborn several times, once to over 5 feet on cement. Panic took control and I of course over corrected while simultaneously swapping thumbs mentally. The result: I sent it full throttle into the cement, nose first. I was amazed that I didn’t break a prop. All the crash did was put a tiny hole in the nose, as show here (the hole is just below the rectangular hole that is just below the prop):
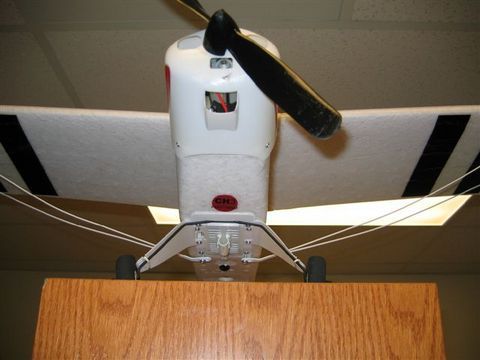
Well, so far no damage done, so I decided to head to the park. Once at the park I went through the pre-flight setup: I did the range check, looked over the control surfaces one more time, and I was ready to go:
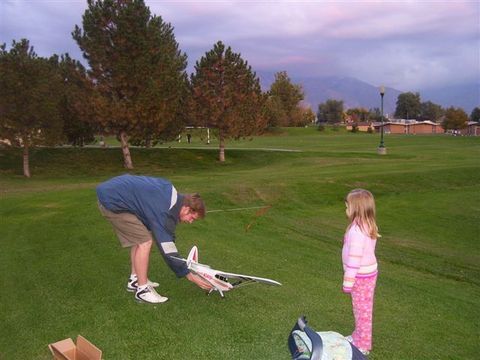
“But wait,” you say. “You forgot to check your trims.” Well, that’s right, I totally forgot to look down at my trim settings, and it turns out they were set to maximum down elevator and maximum right rudder. Well, let’s just say this did not make for a great first flight. Before this plane, I had flown a few AeroAces for a few months, and was quite good at flying those little toys. I never had to worry about trim with those, since a bad trim could easily be adjusted in flight. Here’s a photo of me ignoring my trim settings and preparing to hand-launch the plane:
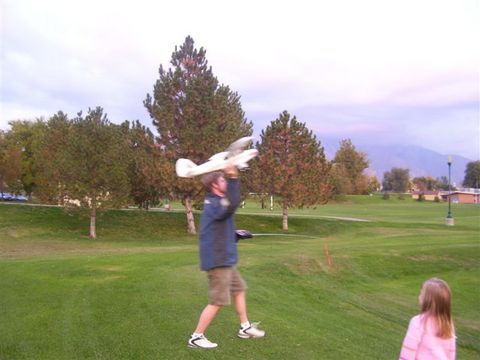
Yes, that’s me throwing the Super Cub in the right hand, holding a badly-trimmed radio in the left hand. Smart.
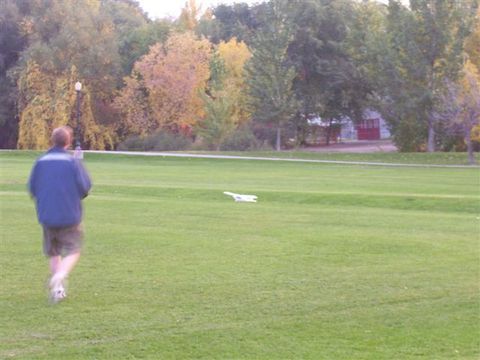
The result: The plane flew downward and almost hit the ground right away (I wish it had). I pulled back on the stick and recovered. Then, I noticed the plane pulling to the right. No problem I said, I can climb out of it and fix my trim when I have enough altitude. The plane shot about 50 feet to the right and crashed into a lip of grass like the one you see to my right in the photo above. Here I am running to get my crashed plane after my first unsuccessful flight, hoping that the Super Cub would fare well despite her idiot pilot (me):
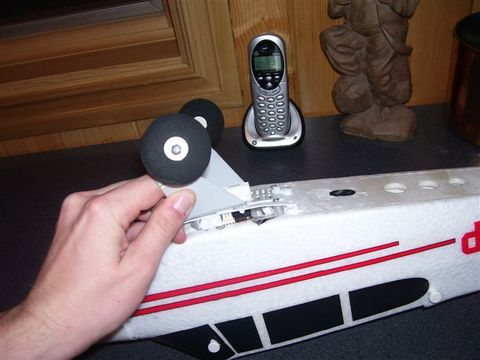
I picked up the cub to discover a plane in good condition, with only one minor caveat: One half of the propellor is totally missing. I decided to run home and get my tools to make an emergency, field fix. This is where I stopped taking pictures, mostly because I was so mad at myself for not looking at the trims before my first flight. I was at least slightly comforted by the fact that HobbyZone had included an extra prop in the box.
After returning to the park with my tools (I left my wife and kids with the plane), I discovered that none of my wrenches were small enough to fit the nut on the prop. I sat there sulking for a moment when it occurred to me that I could use the other prop to get the nut off.
Helpful Field Repair Hint: You can replace a broken prop in the field with no tools by using the new prop as a wrench. One side of the prop fits the hex nut, and, assuming the nut isn’t too tight, can be used to unscrew the nut. I was thrilled. I did the same thing to put the new prop on the shaft. It worked great, and in 2 minutes, I was ready to fly again. I guess that was a wasted trip home for the tools.
I picked up the plane and tossed her again, this time checking my trims. I flew around a few laps and was suprised by a few things:
- This thing flies faster than I expected.
- My brain is still slow at swapping left and right when the plane is flying toward me.Â
- Flying this plane is not nearly as easy as all the videos make it look.
After a few mild crashes with no damage, I thought I’d have one last flight before dark (famous last words). This time I flew it high enough to avoid mishaps and it was a great smooth flight. I circled the park with one big sweeping turn and things were looking good. I decided to see how the plane would react to a little down elevator, so I pushed forward on the stick a bit. The plane went into a dive and lost about 50 feet of altitude. My brain was about 2 seconds slow to process this event, and I pulled back on the stick a bit too late to fully recover. I got the cub to almost level about 5 feet off the ground, but by then it was too late. The prop hit the ground hard, and broke, and this time the landing gear hit hard too. Since the gear is connected to the battery box, it ripped the entire box out of the plane. It appears that none of the electronics are damaged, and the box is in one piece, but the foam around it is a mess:
So now I’ve got two problems: I need another replacement prop (or three), and I need to resecure the battery box back into the fuselage. If anyone has ideas how to do this, by all means, please let me know.
Well, that’s the maiden flight of my HobbyZone Super Cub. I hope you enjoyed it.
57 comments to “Maiden Flight of the Super Cub”
got it jst pull it off with all ur muscles
My 11 year old has been flying the super cub for 9 months now. I wish I had found your blog when we started, but am very glad to be able to read it now. I’d like to add our BEGINNER experience. When we started, our rationale was that we should just take off and land with a very short straight flight. LESSON #1 for us: Take off and landing is the most perilous part. Broken wings, battery boxes, props, tail section, transmitter antenna (?!), wing struts, and lots of gluing with Gorilla glue and 5-min epoxy. It was far better to take off, get very high, and just practice flying. More fun for they boy, less tears/frustration. We found ACS to be a liability and never use it. I found these items to be useful at the beginning: extra props and wing struts, at least two batteries, and packing tape, which we use each flight to give the battery compartment extra support. Foam safe CA glue would have been good too, had we known about it.
Many flights later, he started to tire of doing only loops and circles, so we shifted to doing mainly take-off’s and landings, and the challenge made it more interesting. We now use 2-1/4†Du-Bro tires and 10×8 props, but are otherwise “stockâ€. Our extra battery is a 7 cell NiMH.
Some of our mistakes so far:
1. We realized at some point that we had lost nuts/washers from the prop shaft during one of the early prop breaks and the prop was too close to the cowling, causing it to rub. We also had subsequent problems keeping it well attached because we didn’t have the right combo of nuts/washers. Lesson: write down the configuration of nuts/washers for future reference. Also, you can trim off pieces of cowling that stick up and hit the prop.
2. We replaced a wing before realizing that you can reliably epoxy them together. I had mistakenly thought that it wouldn’t be strong enough once cracked.
3. One wheel nut cracked, and subsequently came off at touch-down, resulting in somewhat of a crash landing.
4. Wheels fell off during flight. Our “landing gear†has loosened over time, and seems to be more solidly attached if we don’t quite place it all the way into the slot. Good luck catching the plane in your hands unless there is a lot of head wind.
5. We learned the well described lesson of flying in too much wind, with resultant “lawn-dart†landing. We had to replace the pinion (prop shaft) for that one, which was only $2, and epoxy the cracked firewall.
I hope these lessons are helpful to others out there. And one more: read this blog and others extensively! Thanks, Dave (and others who took the time to post).
I got my first super cub when I was 11. Over the past years, these are some important tips Ive learned: When you start flying, start out with a hand launch, and fly forward, and land. Once you are comfortable, start trying turns. Try a 90 degree turn, and land. (on grass.) then try turning toward yourself, and do a series of S turns to get used to reverse flying. Once you land that, try flying high, and revolve around yourself. Using your knowledge from the previous tests, land. Once you master that, your good to go!
Repairs: Like just about everyone else mentioned, epoxy and packaging tape will do the trick. However, I recommend buying new parts after they have taken so much damage. I replaced the fuselage, and took all the electronics out. This was fairly easy. Besides that, there has been no major damage to my cub. Most repairs were done by screwing things on and off, and replacing the parts. (props, wing struts, cowl) If you need to glue electronics back in, a hot glue gun worked amazingly.
Tips:
I recommend a simulator. You can go out and buy some $100 software, or download FMS for free. (http://www.flying-model-simulator.com/) Alll you need is a controller to use. NOTICE: I DO NOT TAKE ANY CREDIT FOR FMS!!!!
Also, never fly when its too windy. It is no fun at all, and I crashed into a tree doing this. (when I had to buy a new fuselage.)
I agree, also, pick a nice big field. on my first flight, we chose a field that was too small, so I had to turn without getting up to high altitude. It didn’t go well! I broke the cowl, and snapped the tail!
P.s. When I crashed, the act leads fell out. Anyone know which sockets they go in?
. .
/ / . . ( The cable is marked by a / /, the sockets by . .)
Some good tips there from John.
Time on a simulator makes a huge difference
I’m new to the hobby only been in it for about six weeks now. The first plane I picked up was the T-28 Trojan I was told it would be a good plane to learn on and imp sure it would have been if I was teamed up with some one that was more experienced then I . after several attempts and lots of repair time I found out that the only thing I knew about flying was that gravity was not my friend .so about a week ago I was in a hobby shop buying more replacement parts for the T-28 and saw the Super Cub and the first thing that caught my eye on the box was teach you self how to fly so I bought it. went home put it together watched the CD that came with it .I went out in front of my house and taxied up and down the street so I could get the feel of it then I made a short flight only went for about 30 yards and in a straight line but it let me know that I might have hope after all. i went to an open field near me and the first time I took It up I was able to fly till the battery gave out I had a smile from ear to ear the landing wasn’t all that good but that’s ok I flew .the Super Cub was the best thing for me I’m going to stick with the Cub for a while then go back to my T-28
Wish I had read this before I took my 13 yr old son out on his maiden flight.He actually did make it 3/4 around the large field we were in, but as I have read, the damn ACT screwed him up. I will disable that for good, after what I have read. broken prop (have a spare) smashed nose cowling (will tape and glue) cracked firewall (epoxy coming up). We will be back at it in no time. It really did look very stable……right up to the point of “Lawn Dart” LOL