Super Cub Aileron Upgrade (part 2)
This article is the continuation of Part 1 of the Super Cub aileron upgrade tutorial.
I finished installing the servos for my aileron upgrade today. Here’s what they look like in action:
Thanks to the Spektrum DX6 radio, I can flip the “flaps” switch, and both ailerons go down (called flaperons). This supposedly will give more lift during take-off and landing, so I can keep my speed down without losing lift. To get the flaps to work, I had to set the travel adjustment on my radio to positive 0% and negative 100%. This wasn’t readily obvious to me at first, and it took some tinkering to figure it out. Otherwise, the ailerons would swing upward in non-flaps mode, and downward in flaps mode. That would not be desirable, though I’m curious to know how the plane would fly like this.
Here’s what the servo and push rod look like installed:
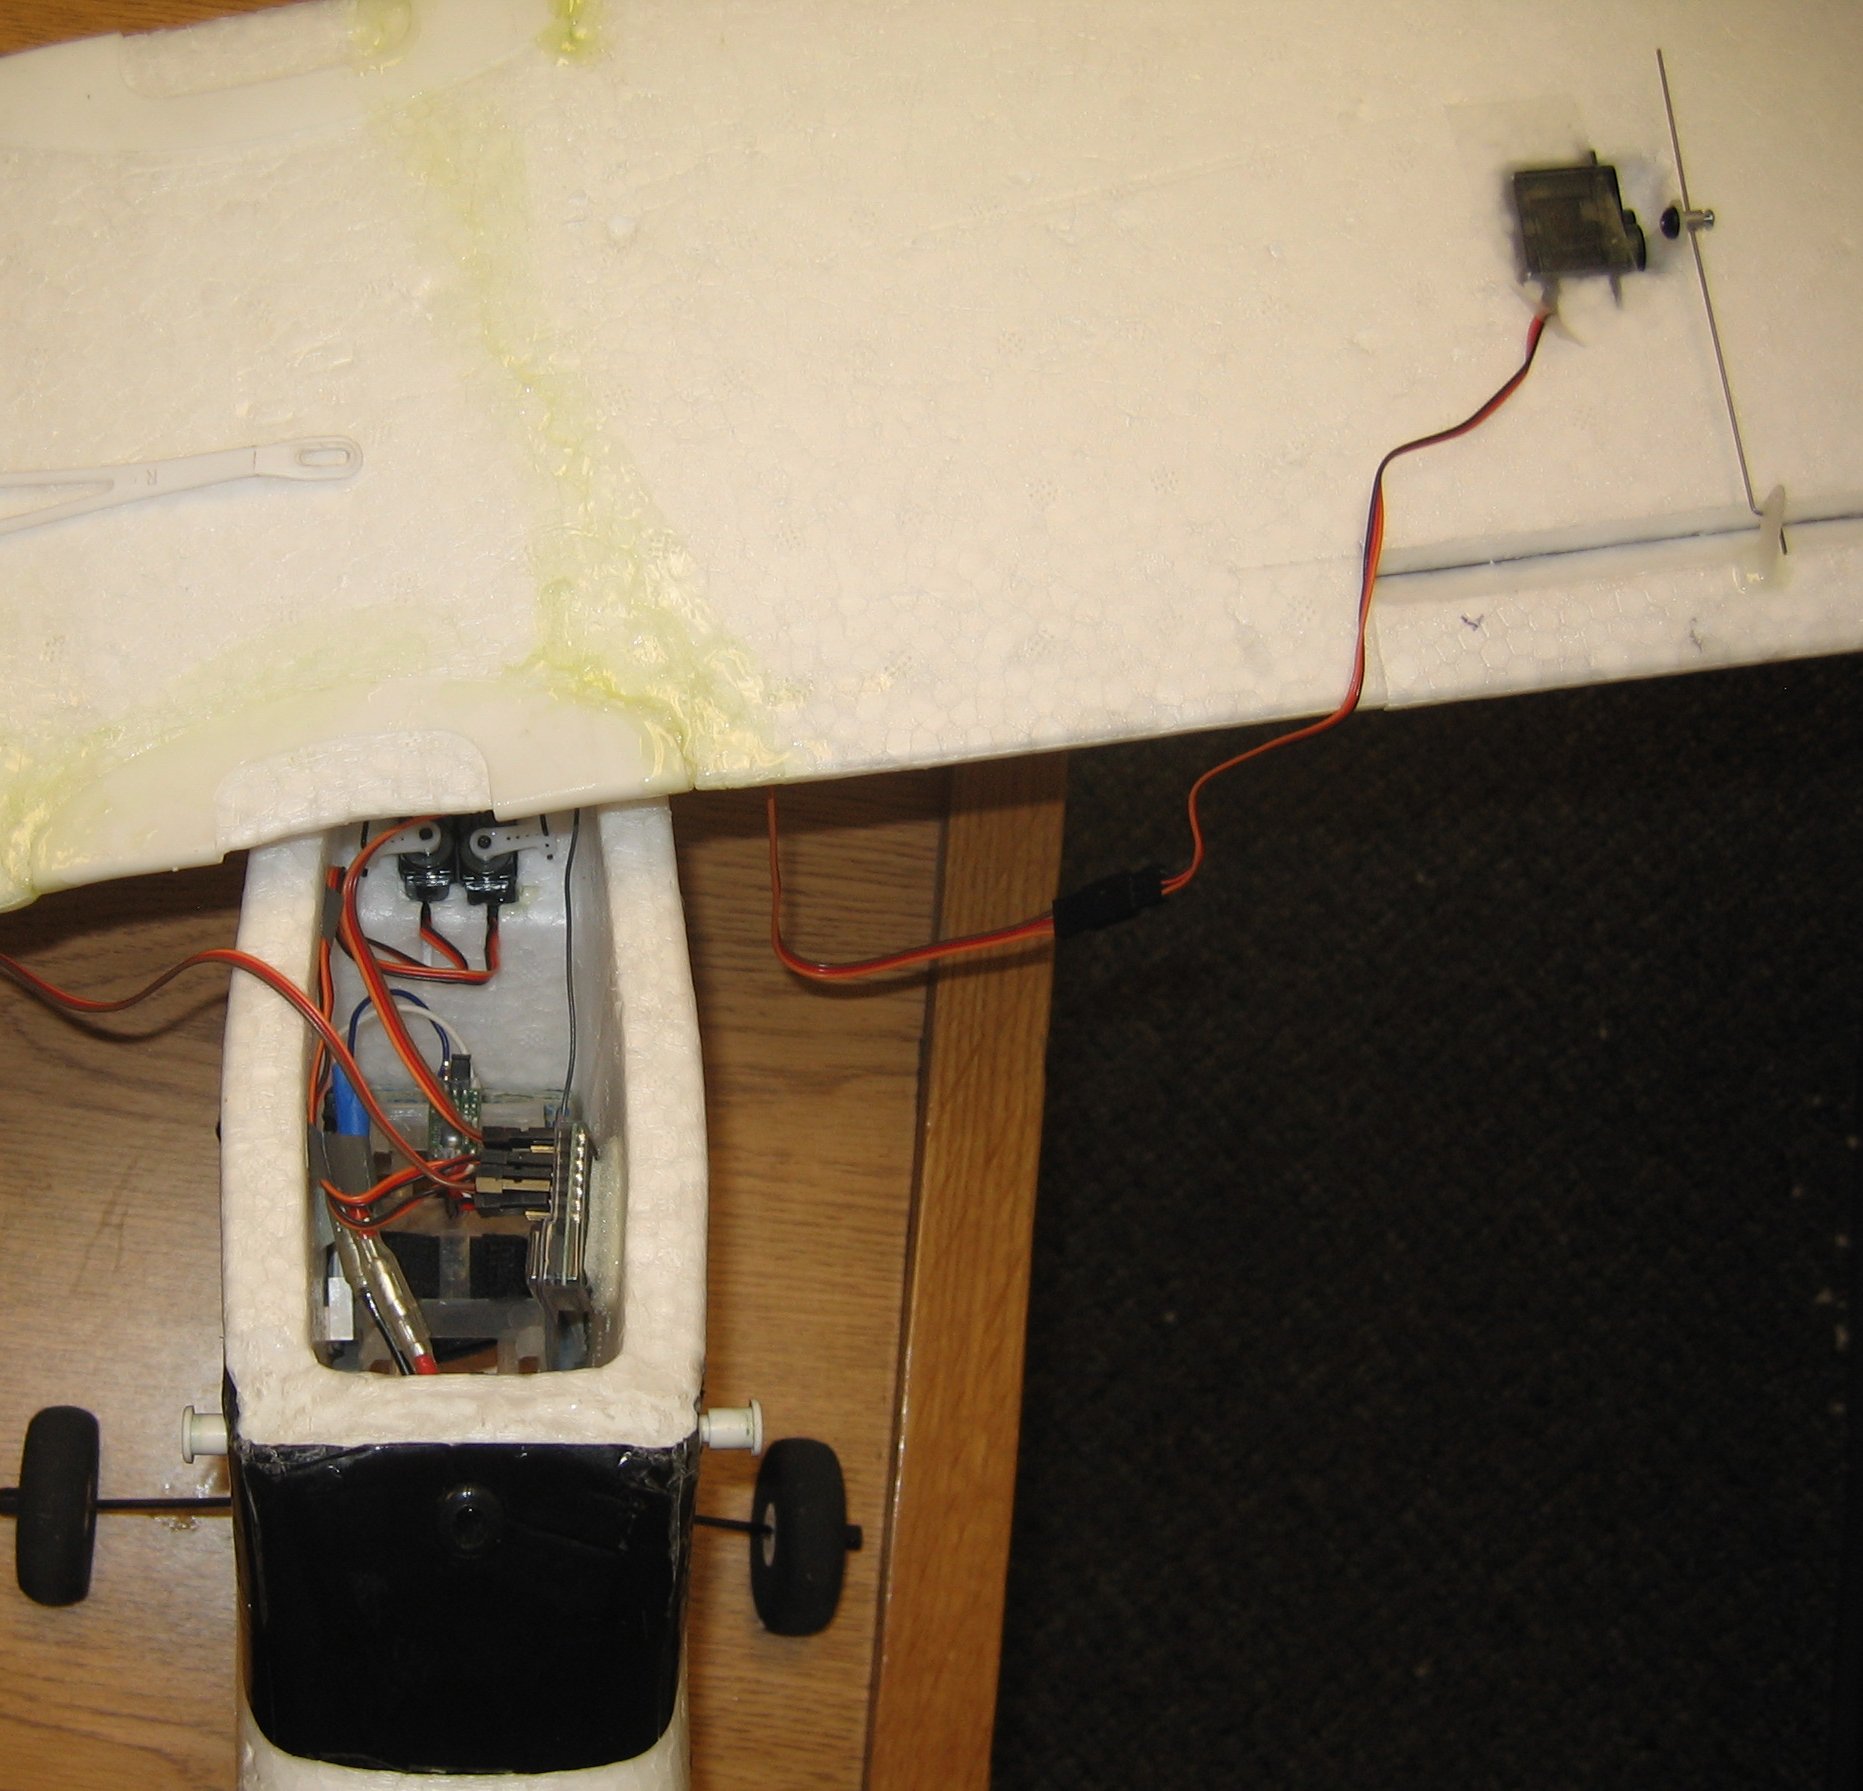
You can also see 5 of the 6 channels plugged into the receiver. This is because each servo needs its own channel to operate in flaperon mode. If I just used a Y-harness instead, then I could have saved a channel, but I wouldn’t get flaps, and we simply can’t live without flaps, can we?
Here’s another close-up of the servo mount from the bottom of the wing:
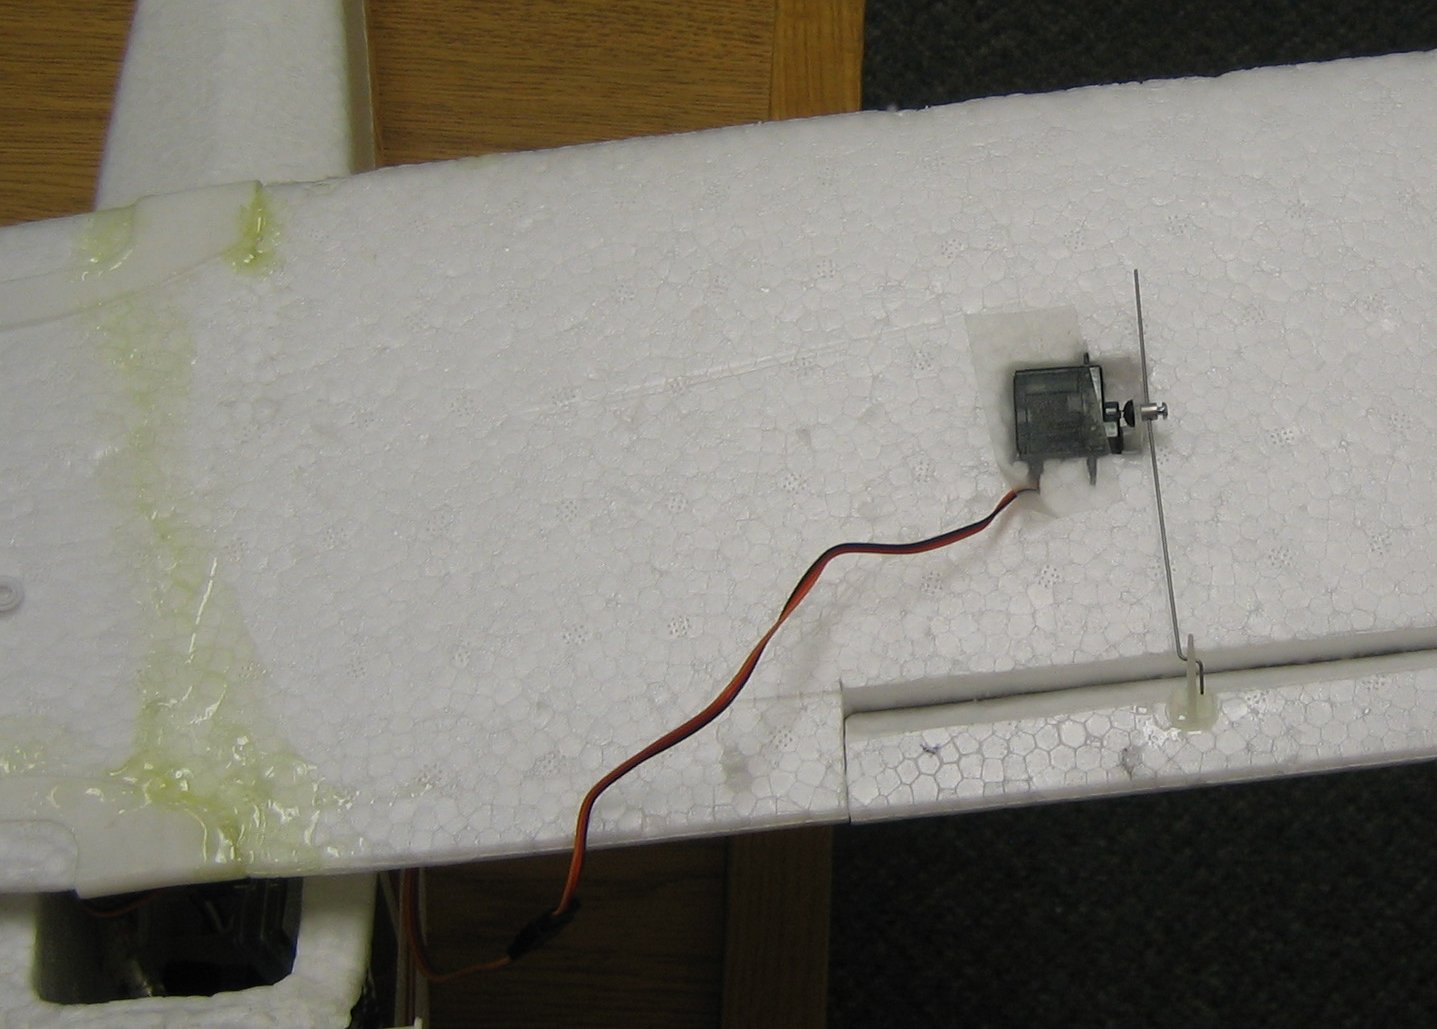
I connected the push rod to the servo control horn with DU-BRO EZ connectors. They make it so you can adjust the length of the push rod more easily by tightening and loosening a screw. The other end of the push rod attaches to the control horn on the aileron, with a simple dog-leg bend (two 90 degree bends, actually). I used two needle-nosed pliers to put the bend in the rod. This should prevent the rod from coming out of the control horn during flight (yikes).
I haven’t inserted the wires into the wing yet. I plan to cut a very thin slice along the bottom of the wing, and shove the wire in it without having to tape it shut. We’ll see if that works.
Read part 3 for flight video and finishing touches.
14 comments to “Super Cub Aileron Upgrade (part 2)”
Try using some strapping tape or 3M extreme tape on the underside of the wing. With this done you can run with the stock wing struts and have no issues with flexing the wing coming out of dives….just a thought.
Dave…
We’ll have to call it the “Super-Super Cub” now..!! Really great job on showing the “how-to” of it. Just not sure how you mounted the servo IN the wing. Is that tape in the servo pic or what..?? While doing this same upgrade “in my mind” this last few weeks… I really thought the dihedral in the SC wing would counter-act, or at least, fight the aileron action. You just proved me very wrong. So much for my “mind” engineering.
Really like that radio system as well. Will be doing some research on that baby. Been looking over the 2.4 Gig stuff… but I figured it would be getting “hit” by every home security cam and wireless phone in any given neighborhood. But reading the AdBlurbs on the system… it seems to search out the “free” 2.4 G channels at any given location. Still seems like you would eventually run into a “saturated” area sometime..??
Also… with that big black box out of the cockpit… what happened with the overall CG of the bird..? Have to add or move any weight around..?
Great job..!!! Thanks for the flight video as well.
Stan,
To insert the servos, I traced their outline with a pencil, then I dug out a hole with my exacto knife. I wrapped the servo in double-sided tape, and then covered it with clear packing tape (wish I had white tape).
You’ll notice that they aren’t exactly a mirror image of each other. The wire comes out of the trailing edge on one, and the leading edge on the other. If I could do it again, I would unscrew the servo arm, and reverse one of the servos. That way they would be symmetrical, but I think this is purely cosmetic.
I can’t tell any difference at all regarding center of gravity. I’m pretty sure the plane is a few ounces lighter, but I haven’t weighed it. There certainly is more room in the compartment now.
About 2.4GHz: Even if there are other devices transmitting on the same frequency, it doesn’t matter because the Rx is smart enough to ignore all data that is not prefixed with the unique number that’s hard wired in the transmitter. It’d just have to work harder to “drop” data coming from web cams, wireless access points, etc. Also note that the Tx and Rx work on 2 different channels, just to be safe.
–Dave
Dave,
I am in the middle of my aileron mod. I am also using 2 servos with the DX6. If you are not using a Y connection for the aileron servos, where does the second servo plug into the AR6000 RX?
Thanks,
It plugs into the Aux channel, and you have to set the wing type to “flaperon” in the radio (I think it’s “FPN”). Search through the user’s manual for “flaperon”, and it will guide you through the steps. I am not terribly impressed with the DX6 user interface, but am unwilling to shell out the extra $150 for the improved DX7 interface. Good luck!
What servos did you use? How much did they cost?
I used the 4 servos that came with my Spektrum DX6 radio. I believe their model number is S75. Along with the AR6000 receiver, they too were included in the price of the radio ($199 retail).
What all will I have to do to use a spectrum dx6 with my supercub? Thanks
To upgrade to the Super Cub to use the Spektrum DX6 (or DX7), see my write-up here:
http://thesmithfam.org/blog/2007/02/27/super-cub-upgrade-to-spektrum-dx6/
Would sitting the sevo upright in the wing work also?
Thanks for posting this on your blog, I did essentially the same thing to my Super Cub with a few differences.
I’m using a Futaba 6EX, so I used a Futaba reciever and S3114 servos (love these).
I cut the ailerons from about 12″ of strait rear wing and carried the cut all the way to the end of the wing for a bit more surface area. Seems to have worked fine.
I made the cuts such that the fulcrum was centered in the wing instead of along the top.
All in all it is a much more fun plane to fly now (also have a Turnigy 3536).
Next on my list is to remove the dihedral with a couple of careful cuts and some square carbon fiber tube guled in as spars.
Seth,
That sounds like a clever way to remove the dihedral. I hadn’t thought of doing that. What I did was stack some books on the wing overnight to flatten it, and then taped it along the bottom with packing tape. It stayed pretty straight. A friend of mine flattened it like that and then inserted a carbon spar. I haven’t seen anyone notch it on the bottom to remove the dihedral. Sounds clever.
–Dave
i want to upgrade my mini super cub. i would like to get the dx6i transmitter. i am leery on doing this because i am a nube to rc flying. i currently just own the mini cub but hope to get a j-3 gas cub. any advice on this upgrade and “tearing out the old receiver?”
hi, how u use the aileron servos mixed with the flaps. i am aso using my dx6i.